Click here to go back to the Index

|
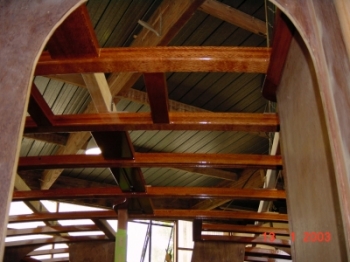
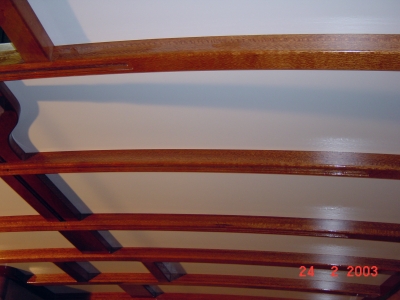
The cabin top beams have been varnished in preparation for fitting the pre-painted cabin top panels (looking aft towards the main companionway hatch). |
 |
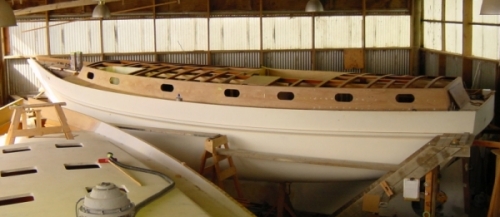 |
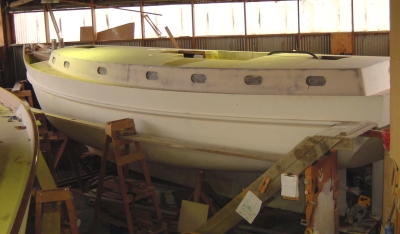
With the deck beams completed, the holes for the portlights have been cut. There will be a total of 15 oval bronze ports (7 down each side of the combing, and one in the stern), and 3 round bronze ports (1 on each side of the cockpit and 1 on the aft end of the cockpit). The ply panels for the cabin top have been dry-fitted, and the location of the cabin top beams marked on each piece. These have then been finish-coated, and will be carefully glued into place to negate the need for a tiresome masking job. The curvature of the beams is now supported from below, using props from the cabin sole. |
|
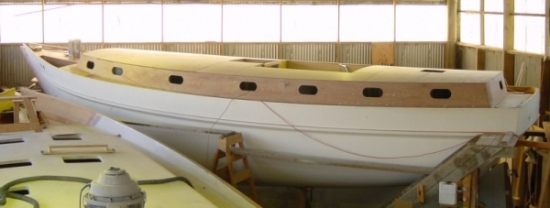
The first layer of the cabin top has been glued into position. This layer is 12mm plywood, and was fastened into place with temporary screws that had been dipped into a release agent. Once the screws had been removed, the plywood surface was faired to remove major surface blemishes and excess glue, and the edges were all trimmed to size. |
 |
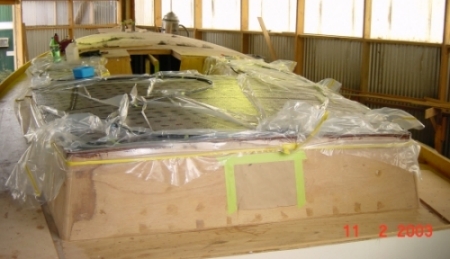 |
The second and third layers of plywood on the cabin top (first a layer of 6mm and then a layer of 4mm plywood) were glued down in one operation (half the boat at a time). This gluing operation was accomplished using the vacuum-bagging technique, whereby the glued plywood is laid under a heavy plastic sheet, which is sealed down at the edges. The air space beneath the plastic sheet is evacuated using a vacuum pump, which compresses the plywood onto the substrate. The vacuum is maintained until the epoxy has cured. This method allows the operation to be completed with greater speed, and the minimum use of fasteners (some screws are required to locate the sheets, and to hold them in position). |
|
The final layers of plywood have been attached to the cabin top, and the surface has been faired in preparation for glassing and final fairing. The cabin beam supports have been removed, but the deck hatches have yet to be cut out (this will be done once the cabin top has been glassed and refaired). |
 |
 |
Here the surface of the cabin top has been glassed with 600 g/m2 double bias cloth, and a coating of epoxy fairing filler applied over the glass before the resin had cured. The surface was then faired using long boards, and the surface checked with battens to eliminate any high or low areas. Note that the 2 larger hatches have been cut out of the cabin top, one forward and one aft. Another 4 smaller hatches have yet to be installed. |
|
With the pre-painted cabin top fitted to the boat, a better impression of the ultimate interior style of our yacht can be gained. Hours spent meticulously cleaning epoxy from paint and varnish after the cabin top panels were glued down has resulted in an exceptionally crisp line between paint and varnish. Notice the small channel running down the underside of some of the central deck partners and some of the beams: this will allow us to run electrical wiring though the beams, while still retaining access to cables. The channels will be covered by polished brass flat strip, rebated flush into the surface of each beam. |
 |